

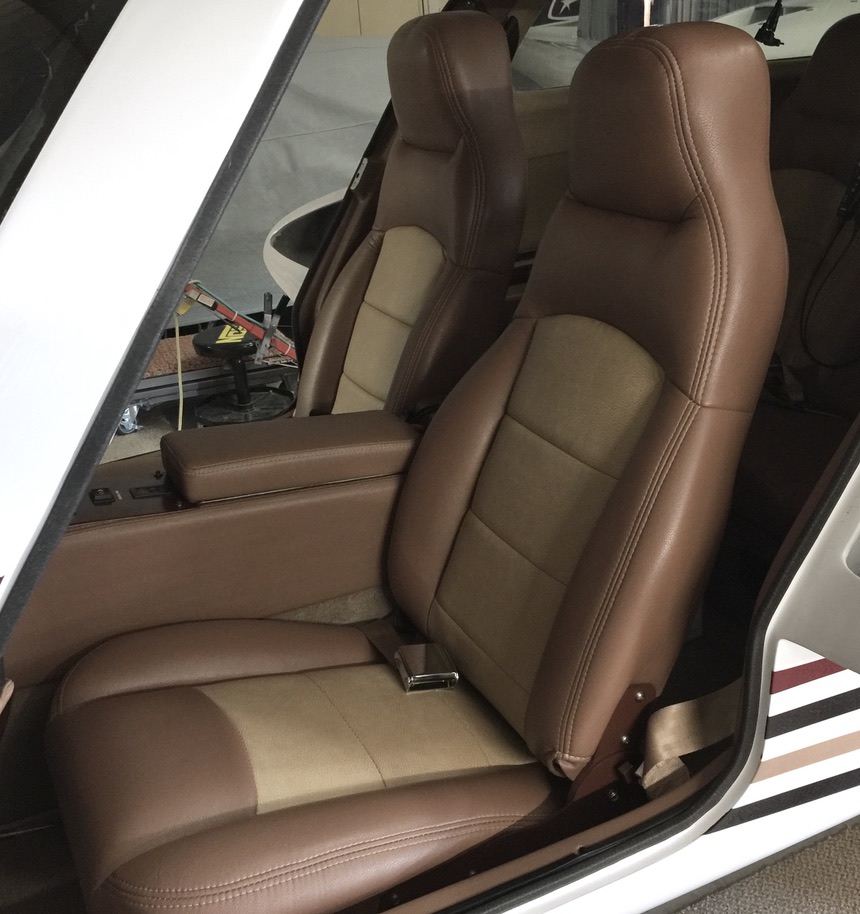
Most of the various tasks that made up my V-Twin project were group efforts. Some, more than others. But in some cases, it was mostly me. Like the interior. I knew what I wanted, and I got it. To be fair, however, the interior guy, Justin, out did himself on this one. He not only helped me choose colors and materials, he came up with a few additional installation “wrinkles” that result in a really professional look. I can’t thank him enough for all of his advice and help.
Justin did the uphostering. I had him add temper foam to the seats. He glued in the side and ceiling panels. He did really nice work on these. He also installed the carpet. I installed pretty much everything else, such things as the stick grip covers and boots, the door kick panels, arm rest, door trim, all the trim pieces, miscellaneous panels (audio, O2, e.g.), keel cover, vanity panels, center console cover, and so on. In addition, I painted any exposed metal, whether part of the seat brackets, or wherever something didn’t have a finished look.

For the doors, I made custom arm rests. While they align perfectly with the stick covers and provide a comfortable place for resting one’s arm while flying, I tapered them as they trailed to the aft edge of the door. This improves the hip room. I also had Justin emboss a star that matches the stars on my paint scheme. I made a custom finished wood handle, along with custom lock actuators. Finally, I found a nice color of paint for the inside of the doors. I used this same color for most of the unpainted interior pieces.
In the rightmost picture, if you look closely, you will notice the small tube that provides the air for the door seals to inflate.
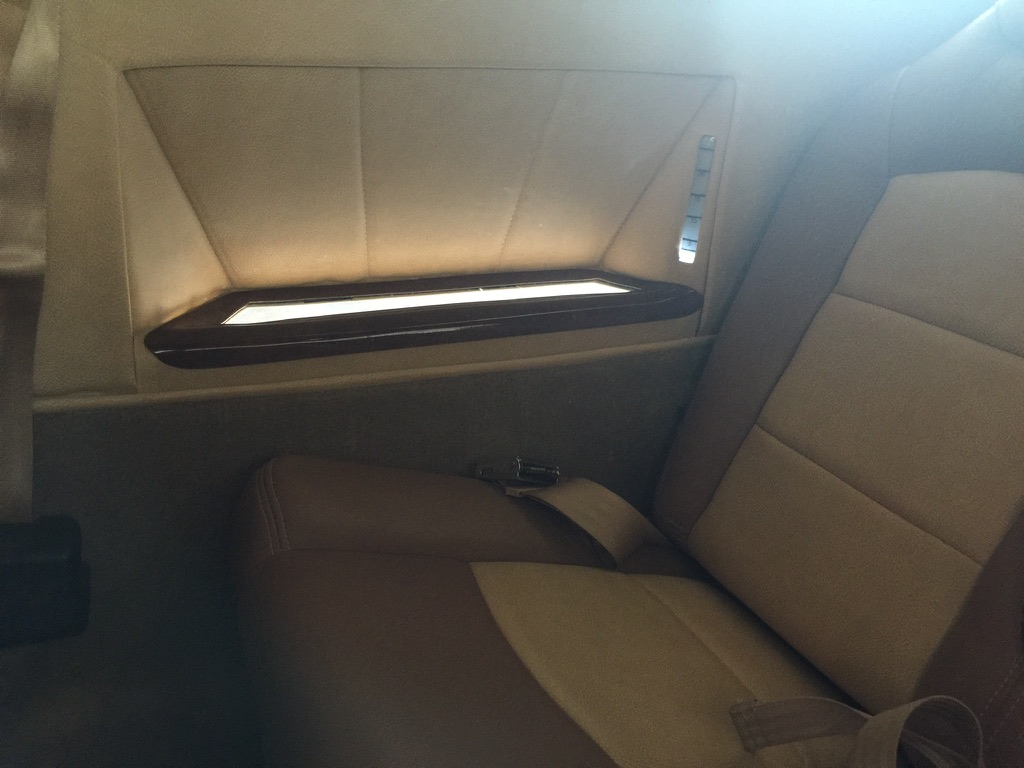
What you are seeing in this picture is one of my down view ports that also serves as an armrest. Since this is a mid-wing airplane, I observed that the back seat pax don’t have much of a down view, so I added these down view ports. Everybody seems to love them.
You can also see the right fuel quantity visual indicator. I added LED lights for these. Yes, I do have capacitance fuel probes for all three tanks (left main, right main, and sump), and they are very accurate. Still, on steep descents, the fuel flows to the front of the main tanks and indicates much lower than actual. For normal flight attitudes, being able to just glance back and actually see the fuel in the tanks is reassuring, and continues to confirm accurate digital readouts. It’s nice on preflight as you don’t need to power up to know your fuel. I use them when refueling, as well, to determine how much fuel I want to take onboard. These visual fuel quantity indicators are quite handy. (A lot of Velocity’s have them.)
So while I installed the down view ports and fuel indicators in the Build Center, I finished up the project in the Completion Center by adding the upholstery and wood grain trim pieces.

I added three dimmable LED lights on the overhead plenum – forward, mid cabin, and aft cabin. It can be a little dark in the back. These brighten everything up quite nicely.
I also added a main gear down view port in the vanity panel. If I’m ever in doubt whether the main gear is locked down, or not, a glance at this view port answers that questions. Again, because it can be dark back there, I added an LED light.
As you can see, I also made custom head rests for the back bench seats. There some pictures of this project in The Build Center.
While we on the subject of the overhead plenum, I also made four custom headset hangars to that the headsets and their cords aren’t strewn all over the place. And I added two camera mounts for recording interior videos.
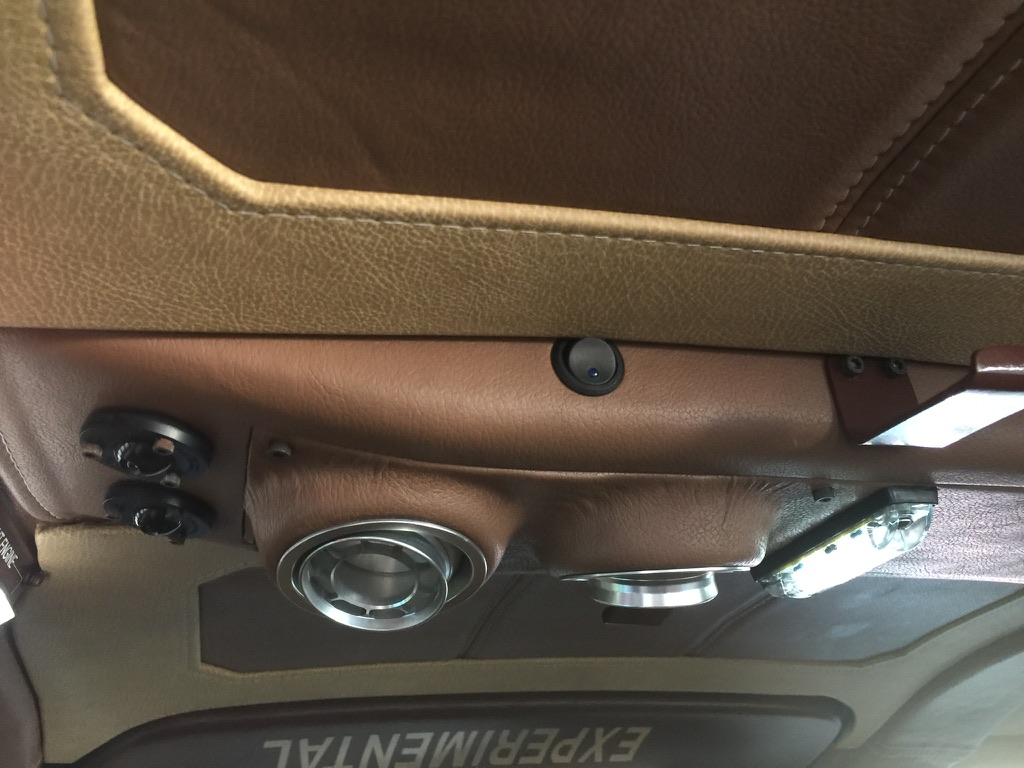
While I was adding lights to the overhead plenum, I also added a couple of adjustable map lights. Everybody needs map lights, right? 🙂 Anyway, there is a switch for individual control of each one of them.
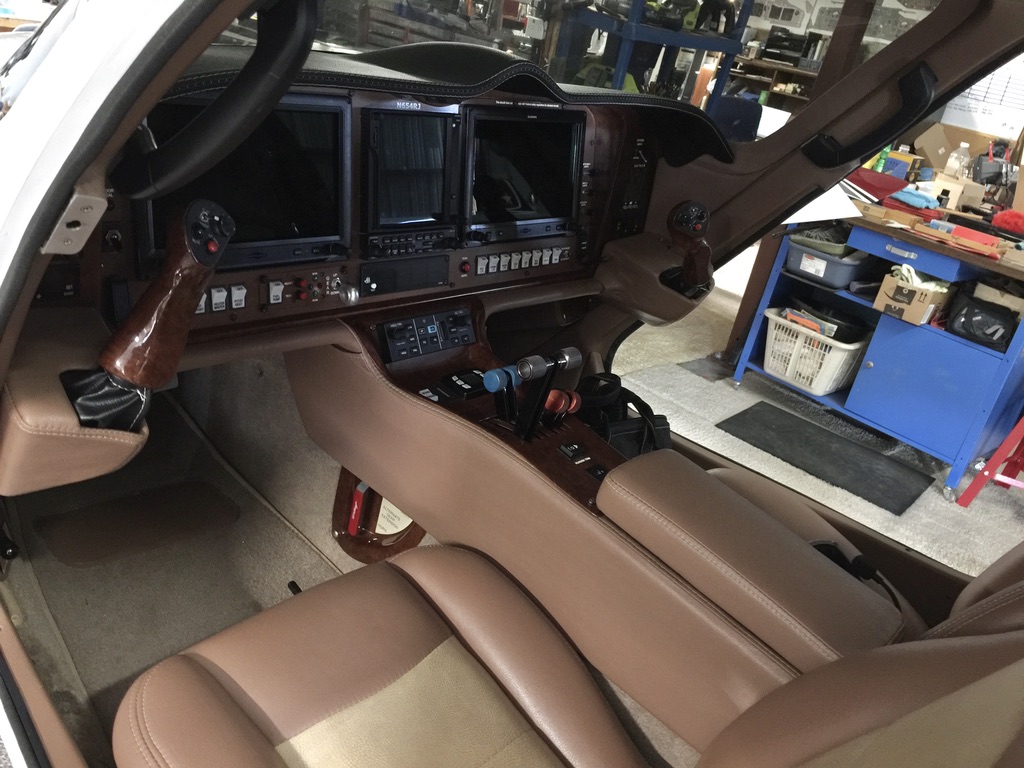
In this picture, you can also see the forward LED cabin light, as well as, the forward two extra large eyeball vents (as described in Air Conditioning.)
Down view ports